
There are almost as many tools of the writing trade as there are writers. Journals, typewriters, loose sheets of paper, index cards, outlines, story boards, Microsoft Word, smart phones, desktops, coffee shop napkins, Google Docs, laptops, Pinterest boards — you get the idea.
Despite this great variety in personal preference, I believe Scrivener is an ideal writing tool for most wordsmiths. Whether you’re crafting the next Great American Novel, a feature-length film, or your doctoral thesis, it has features to simplify and streamline your work.
I’ve been using Scrivener since 2012. With it, I’ve written drafts of novels, memoirs, short stories, and grueling academic papers. In this Scrivener review, I’ll point out some of my favorite features and show you how this stellar app can take your writing to the next level.
This post contains affiliate links. I receive compensation if you use one of them to make a purchase.
Introducing Scrivener: Your New Favorite Writing App
For those of you unfamiliar with the platform, Scrivener is an app designed to help writers tackle their projects from start to finish. While you can use it for the actual act of writing, it’s much more than just a word processor.
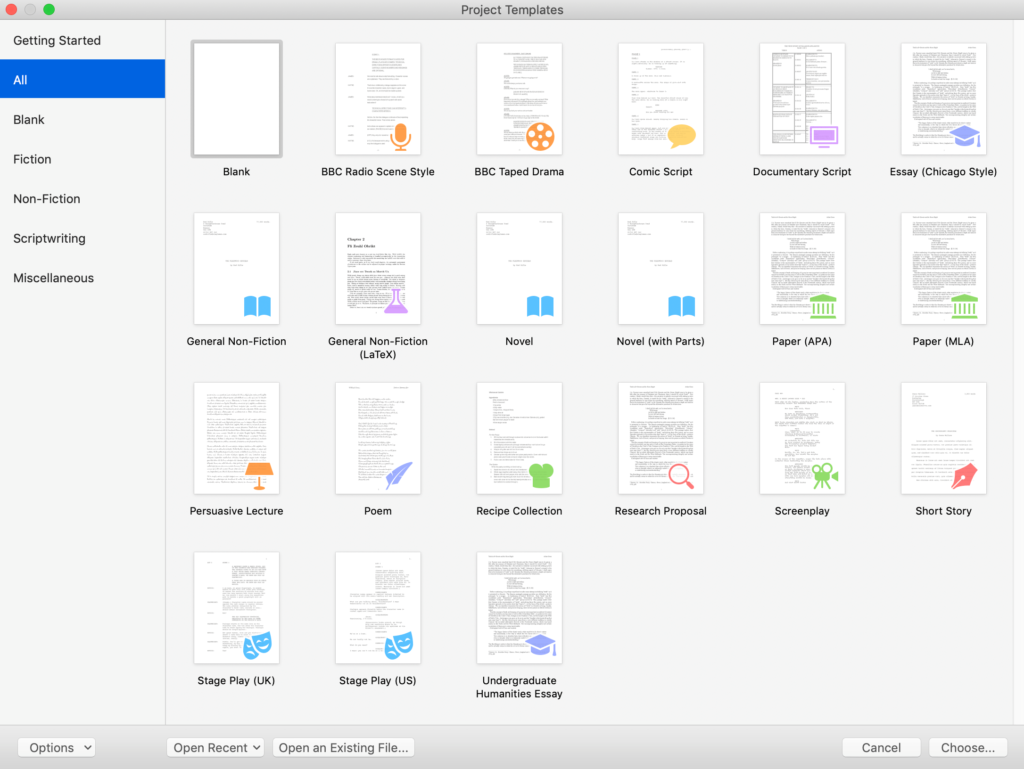
For starters, it provides several templates for a wide range of literary feats, including novels, short stories, scripts, and academic papers:
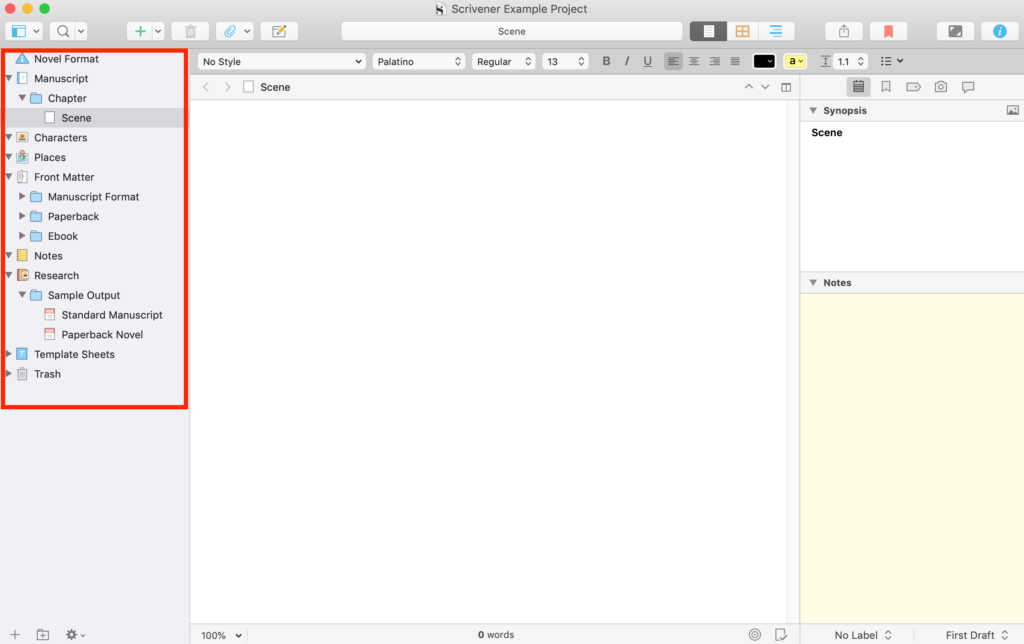
After you choose your project’s format, you’ll gain access to an arsenal of tools to help you research, plan, and organize your writing. The Binder enables you to add chapters and scenes, then rearrange them by dragging and dropping their respective icons:
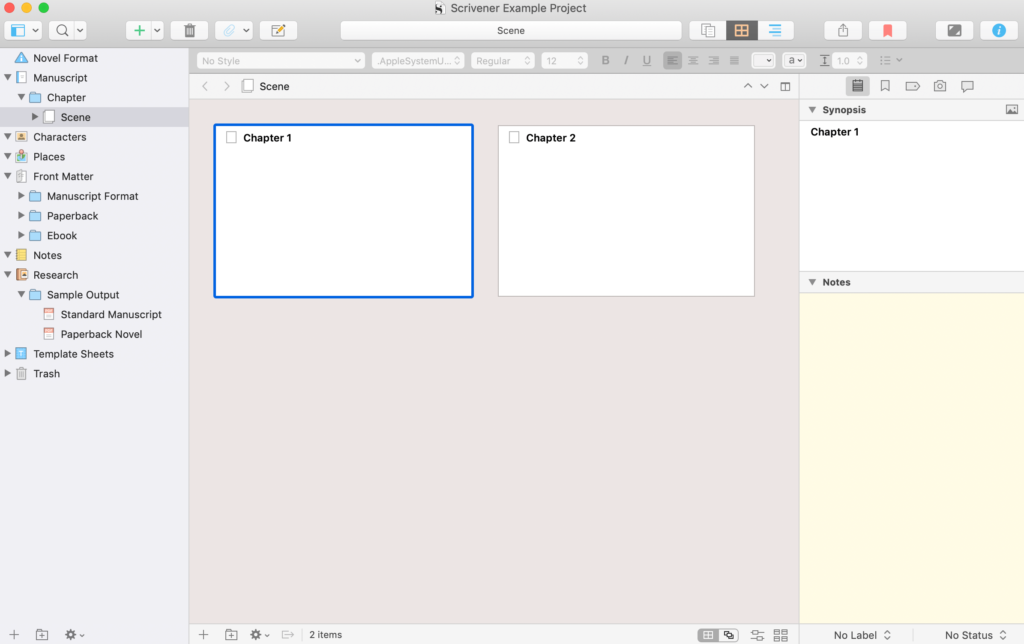
There are also two different ways to outline or plan your project out. Using the Corkboard, you can create, order, and view notecards for the various sections of your piece:
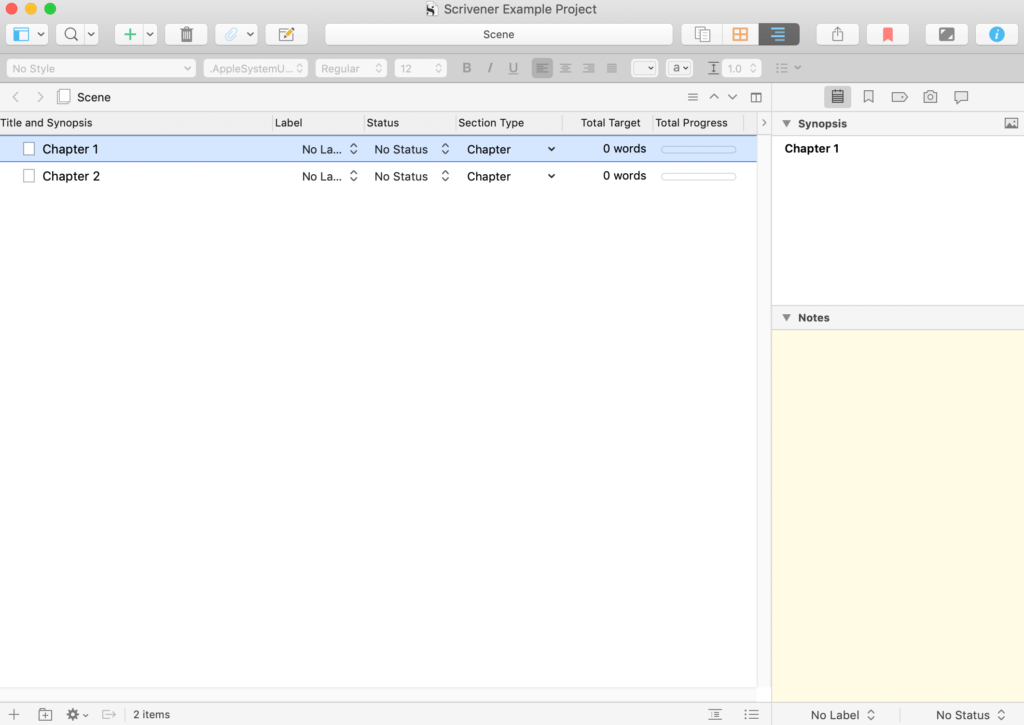
There’s also a more traditional Outliner that lists each chapter and scene in your project. You can include key information here, such as the status of this portion of the text (first, revised, or final draft) and your target word count. There’s even a handy progress bar to show you how close you are to your goal:
One of my personal favorite features of Scrivener, however, is the ability to import various kinds of research right into the app. I’ve used this to keep track of sources for academic papers, as well as to note important information about my settings and characters in fictional pieces.
All you have to do is go to File » Import. You can then select files you’ve saved to your computer (such as PDFs, Word documents, or images) or web pages you want to reference again later:
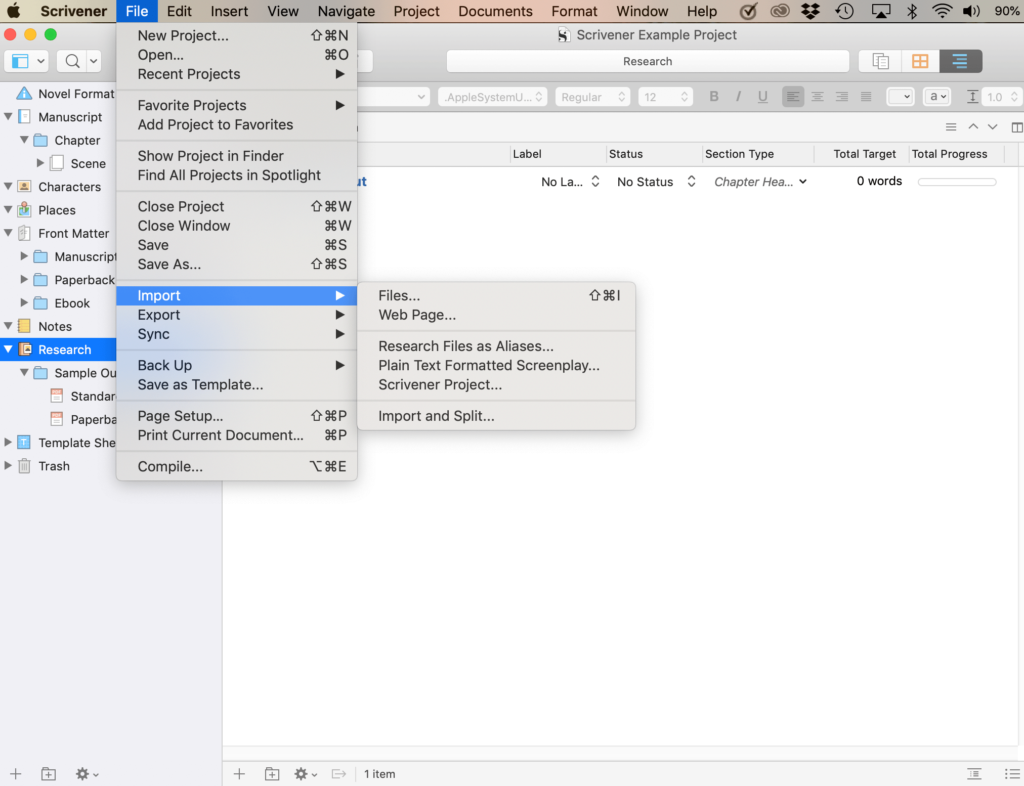
These resources will show up under Research in your Binder for easy access down the line:
These features just scratch the surface of what this app is able to do, as I hope the rest of my Scrivener review will prove.
Scrivener
I’ve been a dedicated Scrivener user for years. I’m confident you’ll love it as much as I do! Click the buttons below to find out more about this wonder app, or purchase Scrivener right away.
Scrivener Review: Two Possible Use Cases
This app has so many handy features that if I were to walk you through each one in depth, this post would be unreasonably long. Instead, I feel it would be more practical if I show you how the app can help you with the two different types of long form writing projects I’ve used it for in the past: novels and academic papers.
For each use case, I’ll point out the unique formatting elements Scrivener provides. I’ll also highlight the tools that may be most beneficial when you’re working on each kind of project.
Writing a Novel With Scrivener
This appears to be the most popular use for Scrivener. It’s no wonder why. Novels are by definition fairly long, and require a lot of planning, organization, and revision to succeed. No Scrivener review would be complete without showcasing how this app can help you achieve your fiction writing goals.
Formatting
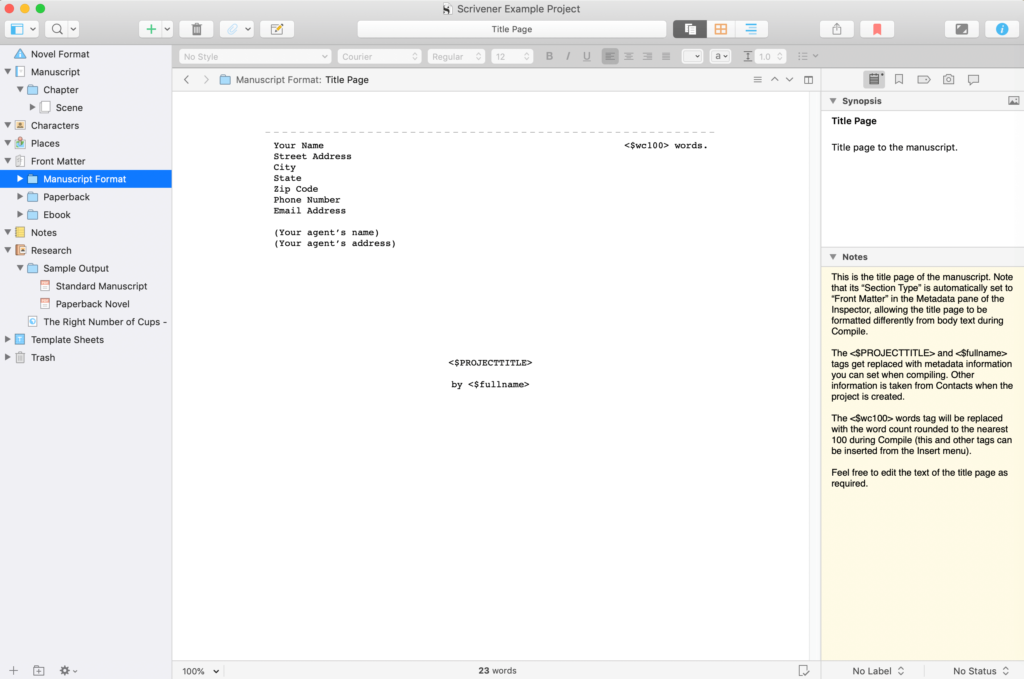
When you select the Novel or Novel with Parts format in Scrivener, you’ll have the option of structuring your project as an ebook, a paperback, or a manuscript (like you would send to an editor or agent). Each of these options includes what’s called “front matter.”
This is some basic information such as your novel’s title, your name, and in the case of the Manuscript format, your contact information. You can see each option’s front matter by clicking on the Front Matter section in the Binder:
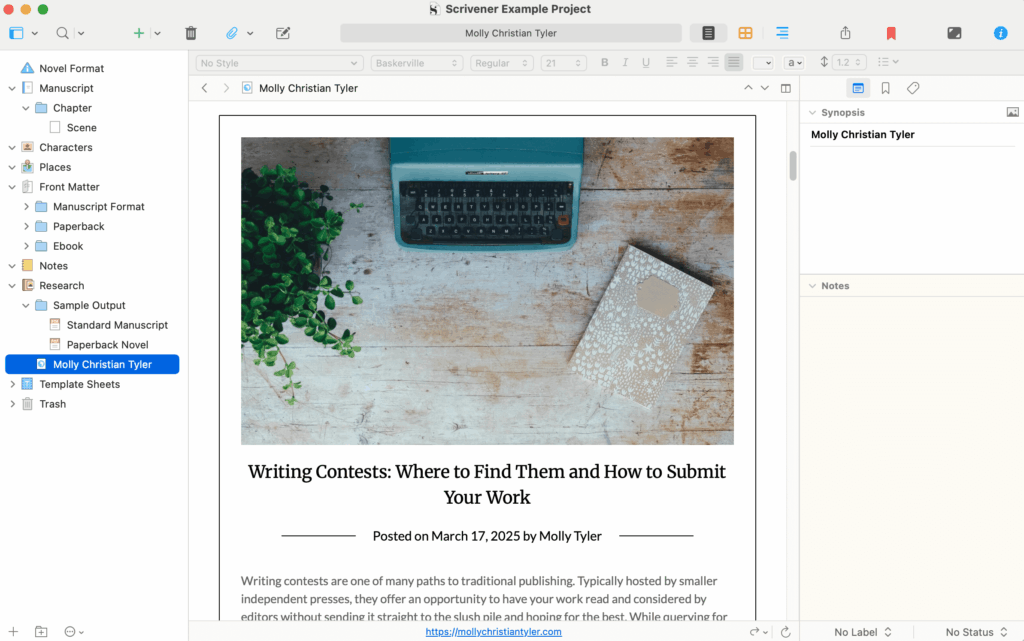
You can also see examples of what your final product might look like in the Sample Output folder under Research:

Finally, there are two other Binder sections that are unique to the Novel format. In the Characters and Places sections, you can incorporate Scrivener’s character and setting sketches:
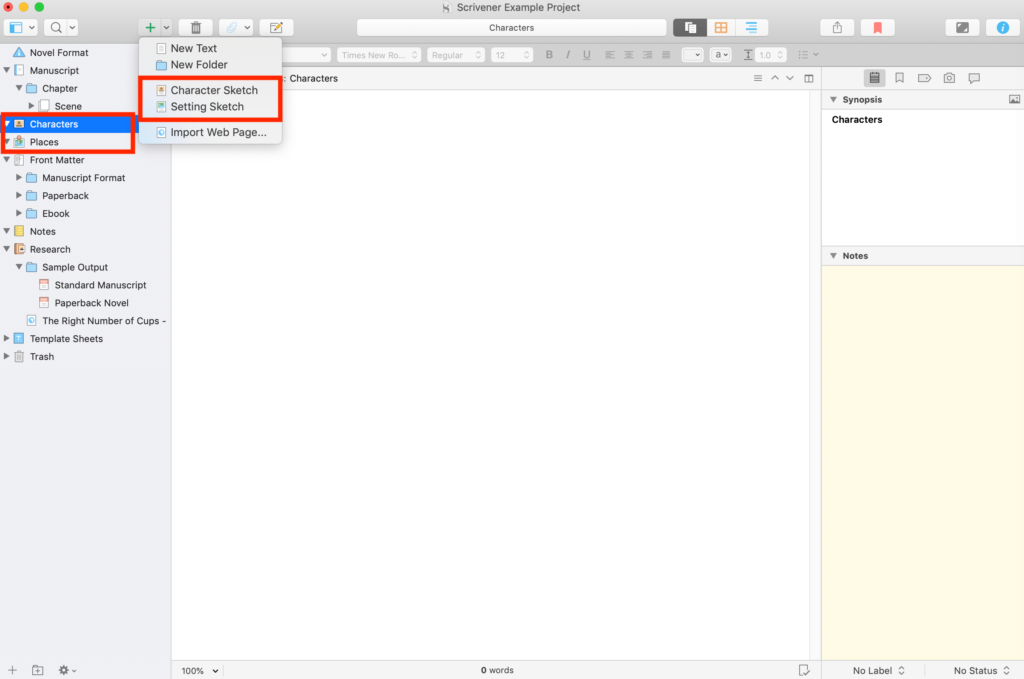
These are planning tools that can help you develop these key elements of your narrative. Keeping them handy while you’re writing makes it east to consult your notes when working out details of your setting or trying to determine how a character might behave in a certain situation.
Planning and Organization
In addition to creating profiles for your characters and setting(s), there are several other ways in which Scrivener can help you plan and organize your novel. We’ve already briefly discussed the Binder and its drag-and-drop functionality for rearranging chapters and scenes.
However, another handy feature is the ability to color code these elements. This is especially useful if you’re working on a project that includes multiple points of view, parallel timelines, or other even more complex structures:

Then you have the Outliner and the Corkboard to work with, too. Anything you add to one will also be visible in the other. If you change your mind about which tool you want to use, all you have to do is switch your view and all your synopses and other information will be carried over.
Additionally, you’ll be able to see the details you add to the Outliner and Corkboard in the Synopsis section of the Inspector (the area to the right of the main editor) while you’re writing:
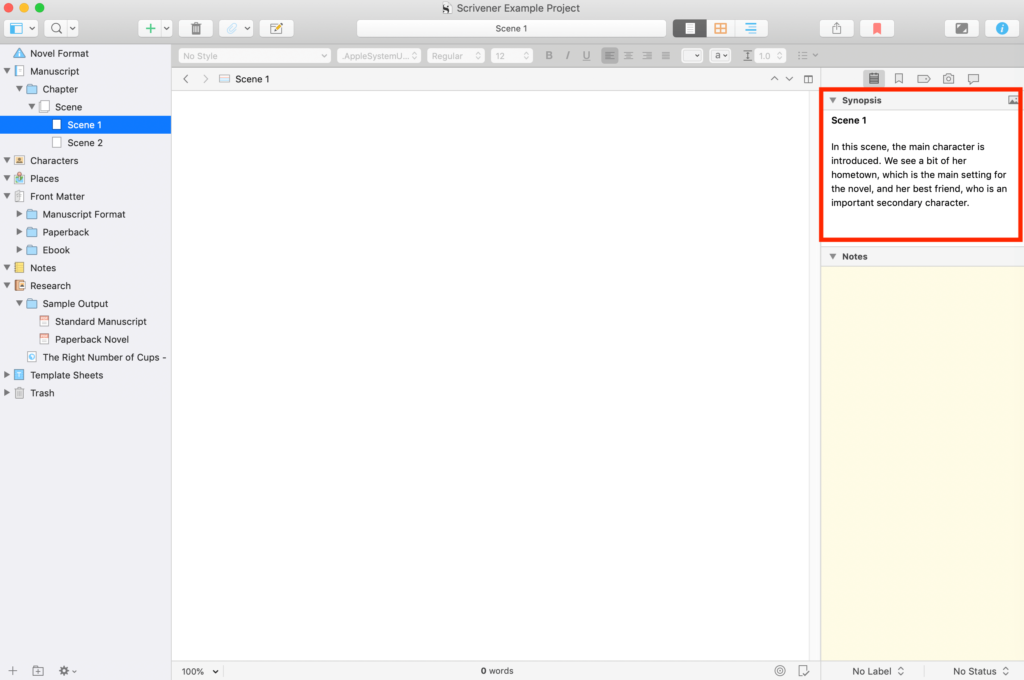
This means no more shuffling through notes or trying to find the right page in your notebook when trying to remember what needs to happen in a specific scene. It’s all there on hand for easy reference.
Composing
Speaking of easy reference, another handy feature for novel writing is the dual-screen composing option:
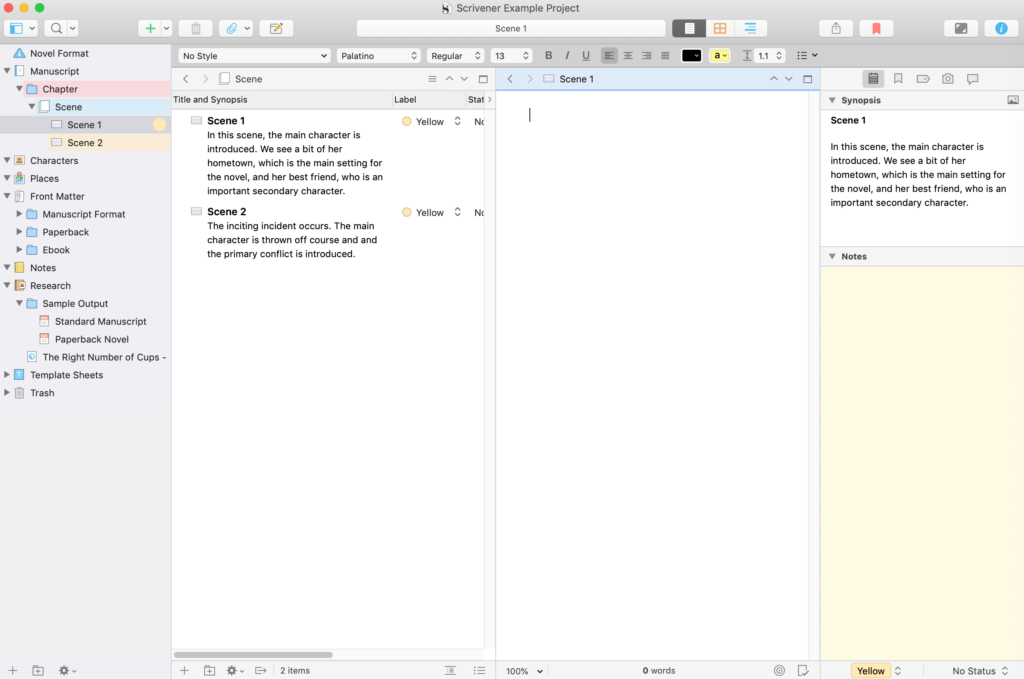
This enables you to view two scenes, a scene and your outline, and various other possible combinations simultaneously. That way, you can consult the larger plan for your novel while working on smaller portion.
Alternatively, if you just need time to get words on the page without distraction, you can use Scrivener’s Composition Mode:

As great as Scrivener is, there’s a lot going on in this app. Blocking out the Binder, Inspector, and toolbar can help you focus on what matters most — your novel.
Writing Academic Papers With Scrivener
Especially once you start getting past the ten-page mark, academic papers are no joke. They require tons of research and careful organization to explain your argument clearly and persuasively.
I haven’t read many other Scrivener reviews about users doing this, but I’ve utilized Scrivener to compose many an essay. The app includes formats for Chicago, APA, and MLA styles, so you’ll be covered no matter which you need.
Formatting and Citing Sources
Managing sources and citations can be one of the most difficult (and boring) parts of writing a paper. When you select one of Scrivener’s academic paper formats, the app will provide a sample Works Cited page:

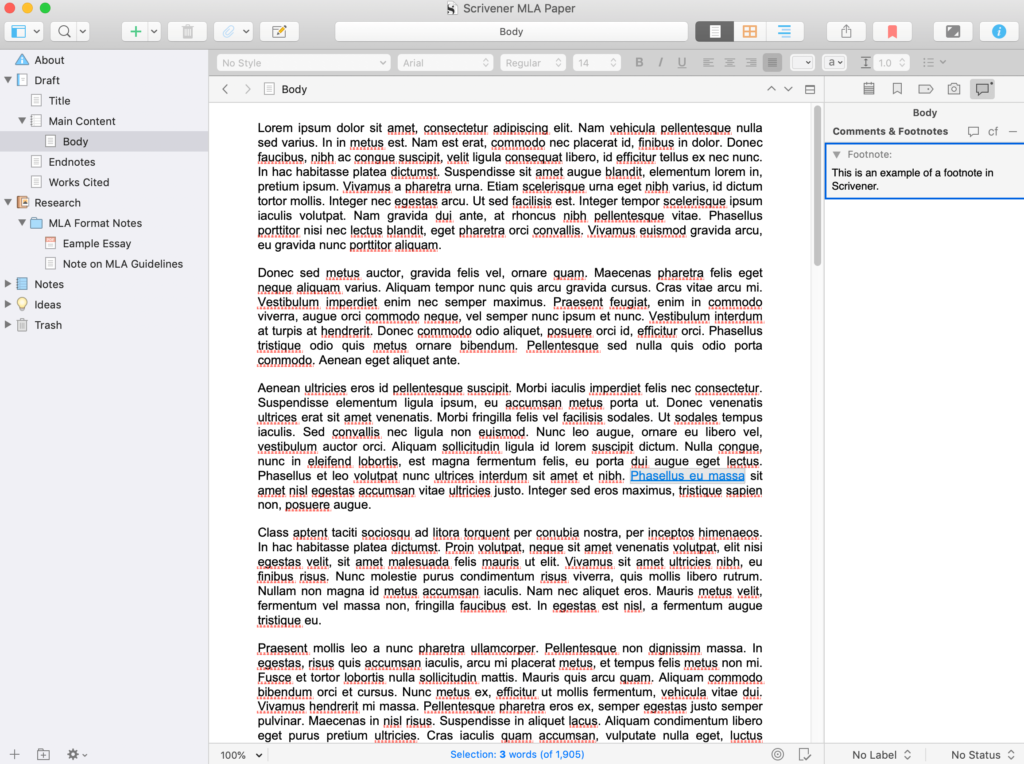
You can also add notes in the main composition area. Footnotes will be incorporated on the relevant page, and collected as endnotes for you:
Of course, no matter which tool you’re using to build your bibliography (looking at you, EasyBib), it’s always best to check your formatting. Every style guide is periodically updated, and automatic citation generators may not be up-to-date. Plagiarism is nothing to mess around with! Purdue Owl is an excellent resource, and can help you make sure your sources are properly listed.
Another handy feature is that Scrivener can format block quotes for you:
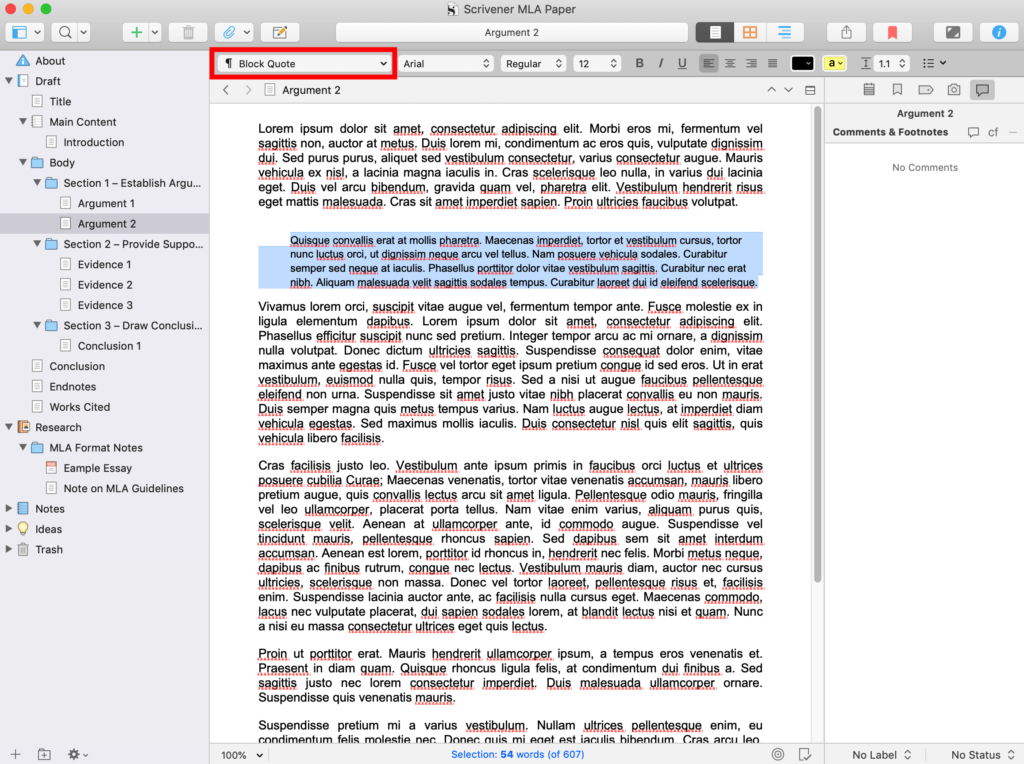
I realize you can set up Microsoft Word to do pretty much the same thing, but it’s still nice to know this is available to you in Scrivener.
Organization
Especially if your paper is on the long side, having a way to organize and rearrange sections is extremely useful. This can make working on a lengthy paper feel more manageable and less intimidating by breaking it down into bite-sized chunks.
The Outliner, Corkboard, and color coding features I’ve already mentioned are all available in the various academic paper formats. Plus, just organizing your sections into documents and folders in the Binder can help you visualize your paper’s trajectory:
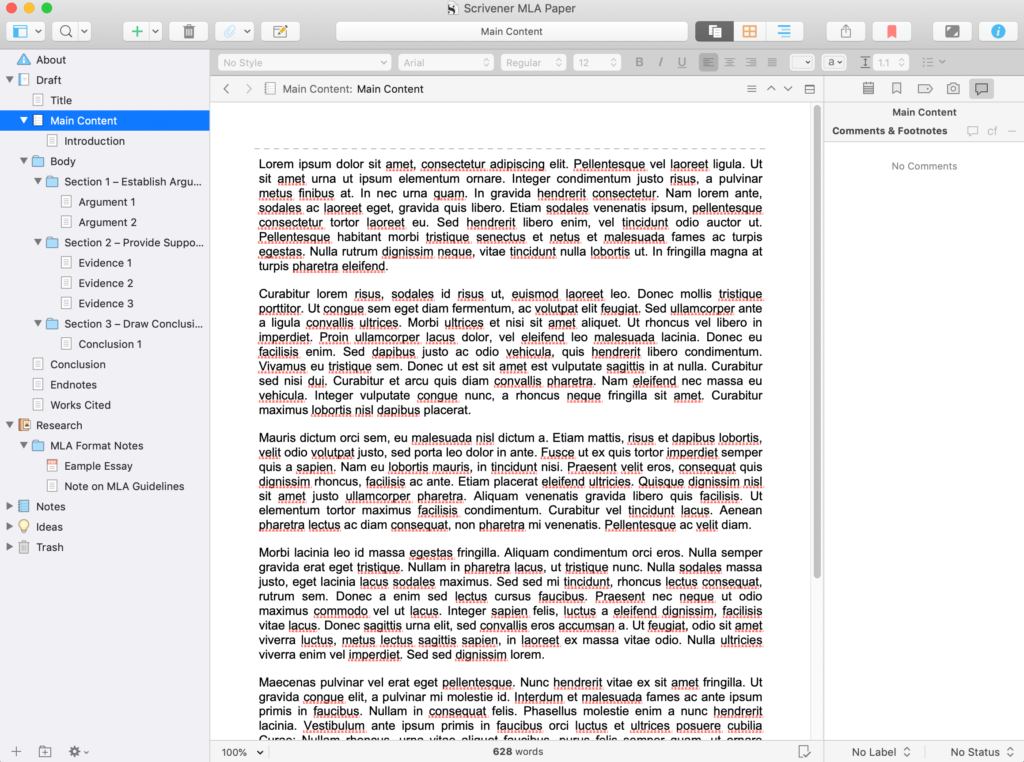
When I was a student, I was big fan of outlining my papers in Scrivener. It’s easy to move things around and to add new sections when you need to.
Research
I’ve already sung the praises of Scrivener’s Research importing feature, but it needs to be mentioned again here. You’ve probably suffered through keeping 12 tabs open in your internet browser so you have have all your sources handy while writing your papers.
With Scrivener, those days are gone. You can just import all your webpages right into your project. Plus, you can easily add PDFs from books you’ve scanned or journal articles you’ve downloaded, too.
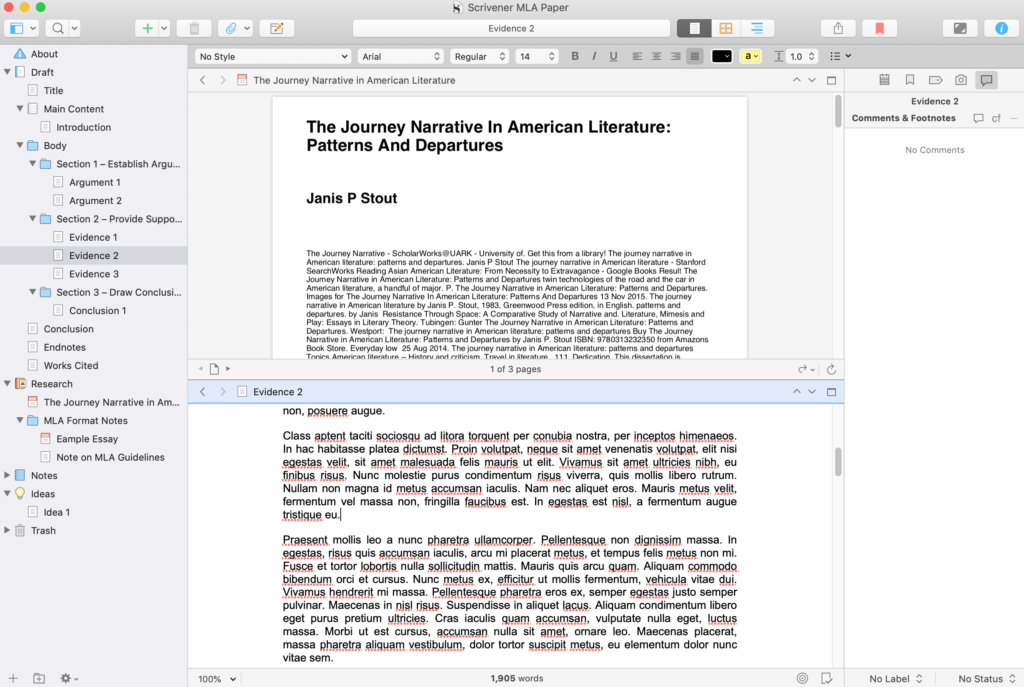
In my opinion, this feature is absolutely invaluable when you’re writing an academic paper. You can even use the dual composition option so you can easily reference your material or retype quotes without having to switch back and forth between tabs:
This is a huge time (and headache) saver. Additionally, you can use the Notes and Ideas sections to save snippets that you want to use later:
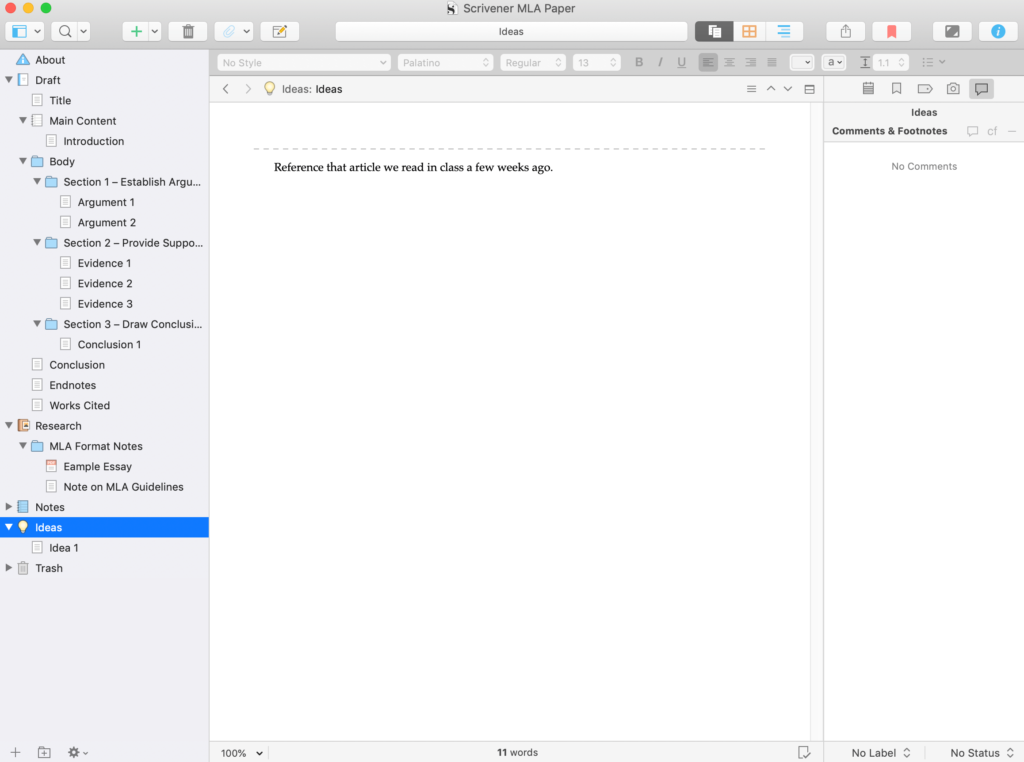
When you have a half-formed thought on how you might improve your argument but don’t know where it’s going yet, this is a great place to store it. Then you can come back to it later and work on how to expand upon it.
Conclusion
Writing involves a lot of hard work — more than most people think! One of the best things you can do to help your next project stay on track is to invest in a tool that will keep all your materials in one place from start to finish.
Since 2012, I’ve used Scrivener to write everything from high school English papers, to National Novel Writing Month (NaNoWriMo) projects, to my graduate thesis. In all that time, I’ve yet to find a fault. It’s my absolute favorite writing tool, and I wouldn’t recommend it otherwise!
Have questions about Scrivener? Let me know in the comments section, and make sure to subscribe to my email list for more tips!
Leave a Reply