To outline or not to outline is one of the biggest questions you have to answer when developing your writing process. Personally, I’ve always found it beneficial to do at least a little bit of planning before putting pen to paper.
Learning about outlining in Scrivener has been a huge help to me in keeping all my notes and thoughts organized while crafting a first draft.
Scrivener’s outlining features are one of the biggest benefits of using this writing app over a generic word processor. In this post, I’ll discuss the benefits of creating an outline in general, then share brief introduction to Scrivener before showing you how to take advantage of its planning tools.
This post contains affiliate links. I receive compensation if you use one of them to make a purchase.
Should You Create an Outline Before You Start Writing?
You’ll find plenty of arguments for and against outlining before you write. On one side, you have literary professionals and practitioners who say that doing extensive preparation before drafting limits your creativity and discourages you from exploring possibilities in your work.
On the other are writers who say that knowing what’s supposed to come next gives them momentum and helps them avoid becoming stuck. They don’t have to sit in front of their keyboards wondering where the plot is going and can instead work on developing their characters, setting, and themes in their first drafts.
In my opinion, both sides are right. The solution? Create an outline before you start your first draft, but be willing to deviate from it. That might mean veering off course in the middle of your draft because you’ve had a new idea and want to take the plot in a different direction. You could rewrite your outline or simply let inspiration take over and craft entire scenes off-script.
Alternatively, you may wait until your second draft to make changes. Or, you could write your first draft and then create your outline. Sometimes it takes writing all the way through your initial idea to see its flaws and figure out how to improve upon them.
That said, every writer is different. The best process is the one that gets you the results you want, whether that includes outlining or not.
A Brief Introduction to Scrivener
If you’re not already familiar, Scrivener is a writing app that includes several built-in planning tools, templates, and more. There are multiple advantages to using it over a traditional word processor, including the ability to keep your outline(s), research, and other notes in the same file as your primary manuscript.
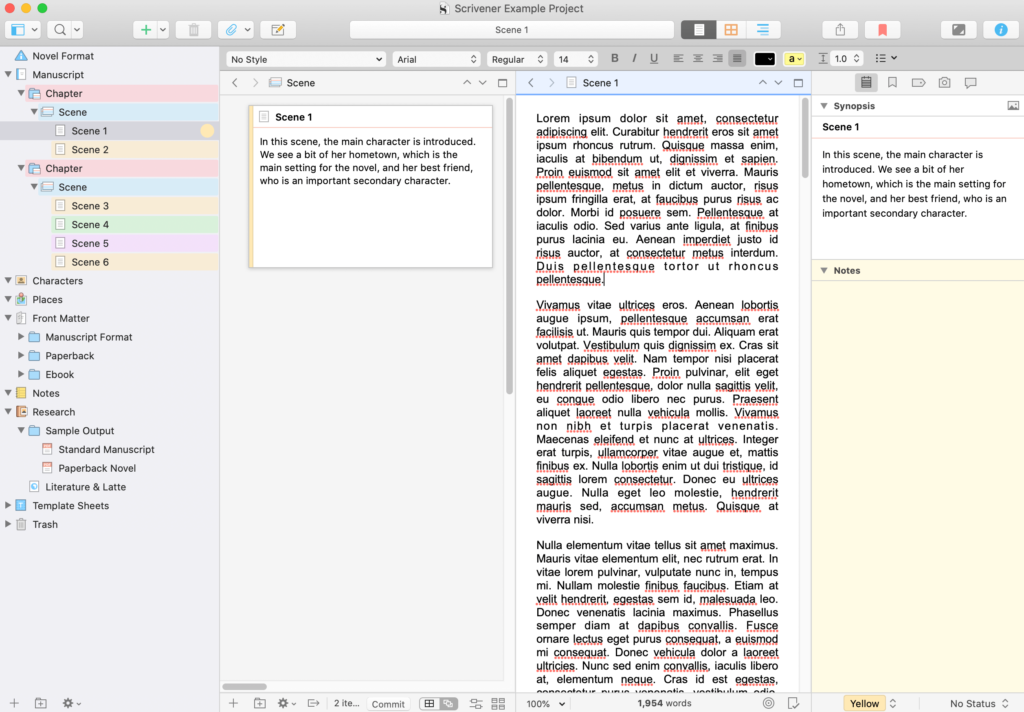
This can help you save time when you need to reference your notes, as you don’t have to switch back and forth between documents. You can even view your outline and your draft side-by-side:
If you want to learn more about the app, check my full review!
Scrivener
I’ve been a dedicated Scrivener user for years. I’m confident you’ll love it as much as I do! Click the buttons below to find out more about this wonder app, or purchase Scrivener right away.
How to Outline in Scrivener (2 Methods)
There are two primary tools you can use for outlining in Scrivener. You can choose your favorite, use them both in tandem, or utilize one or more of the other planning tools the app includes to map out your writing project.
Method 1: The Corkboard
One option for outlining your project (and in my experience the more popular method) is the corkboard:
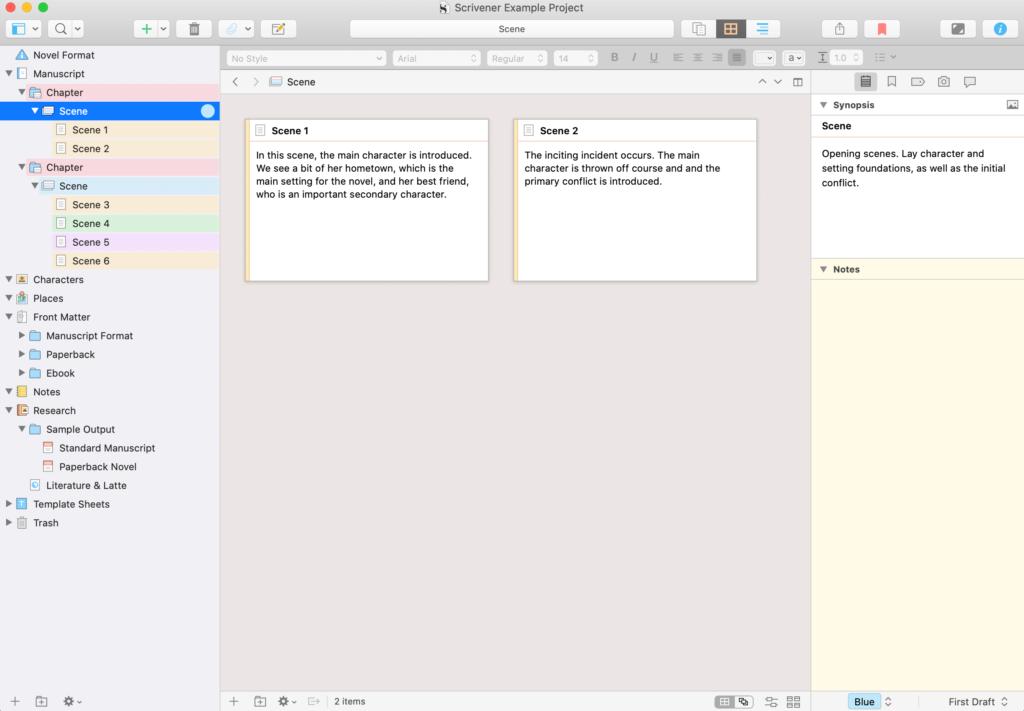
This virtual corkboard enables you to organize notes about your scenes, chapters, and sections on individual notecards. Typically, each card contains a short synopsis of the chapter or scene in question (although you can use them however you like).
You can access the corkboard by clicking on its icon at the top of the Scrivener window:
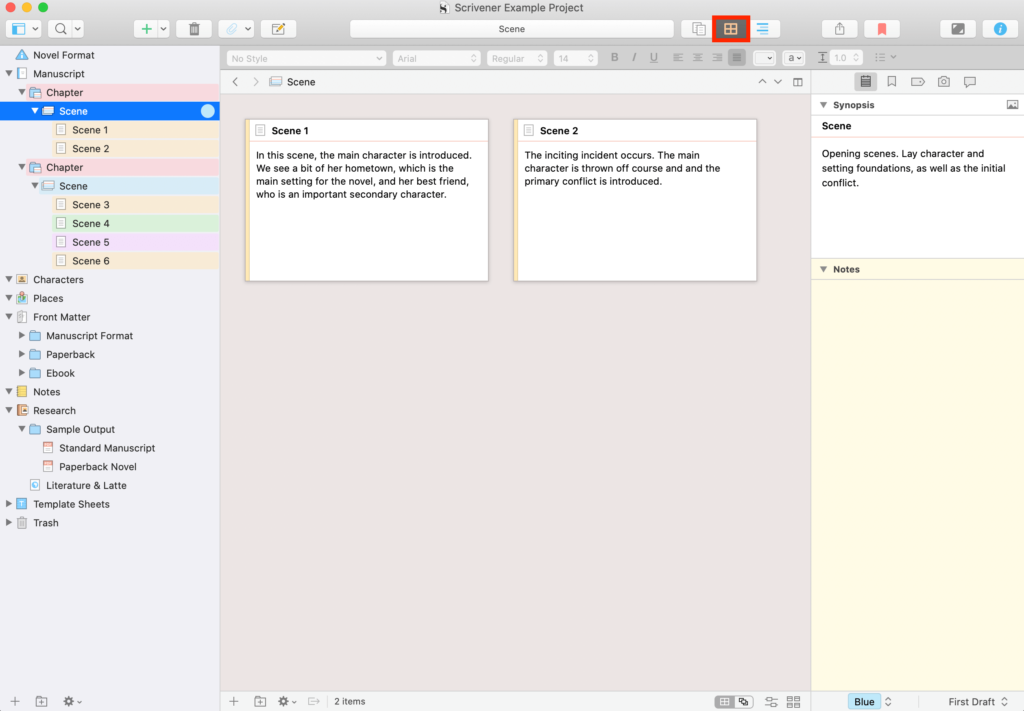
There are a few different corkboard layouts you can use. The standard option (shown above) presents your notecards in an ordered grid. You can click on the Freeform corkboard icon at the bottom of the screen to completely customize the placement of your notecards:
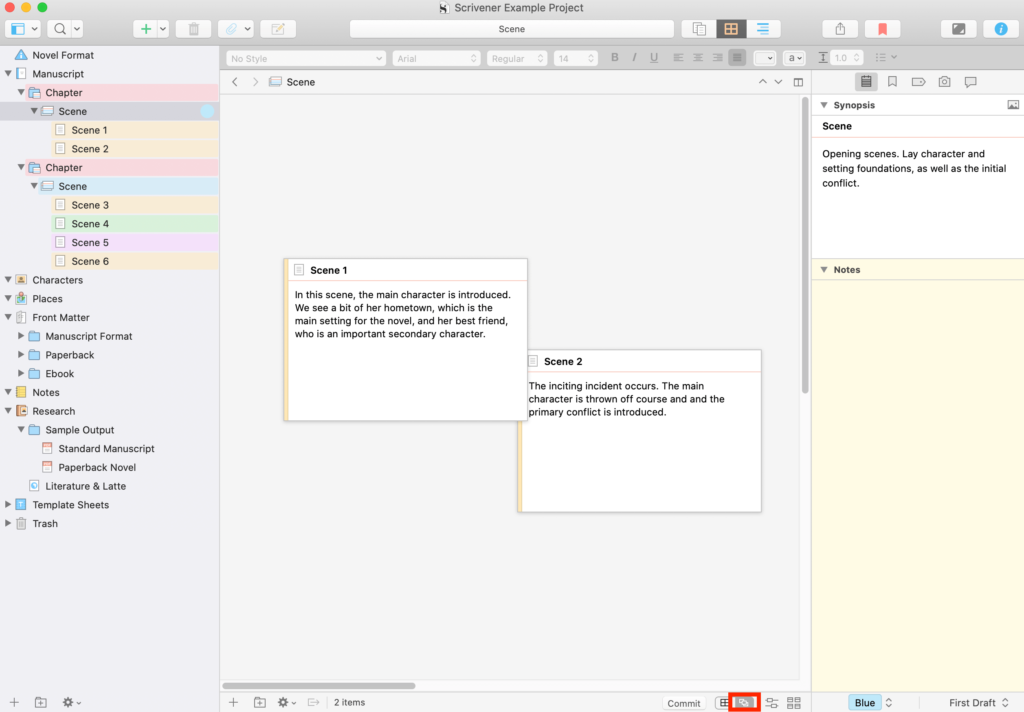
Both views enable you to drag and drop notecards while outlining in Scrivener. However, doing so in the grid view will also change the order of your documents in the manuscript; the freeform corkboard is purely visual and moving cards will not affect your project’s order.
The next button in the corkboard footer will arrange the documents in your selection by label (a color-coding feature you can use to organize your documents). Dragging and dropping documents in this view can change their order as well as their label:
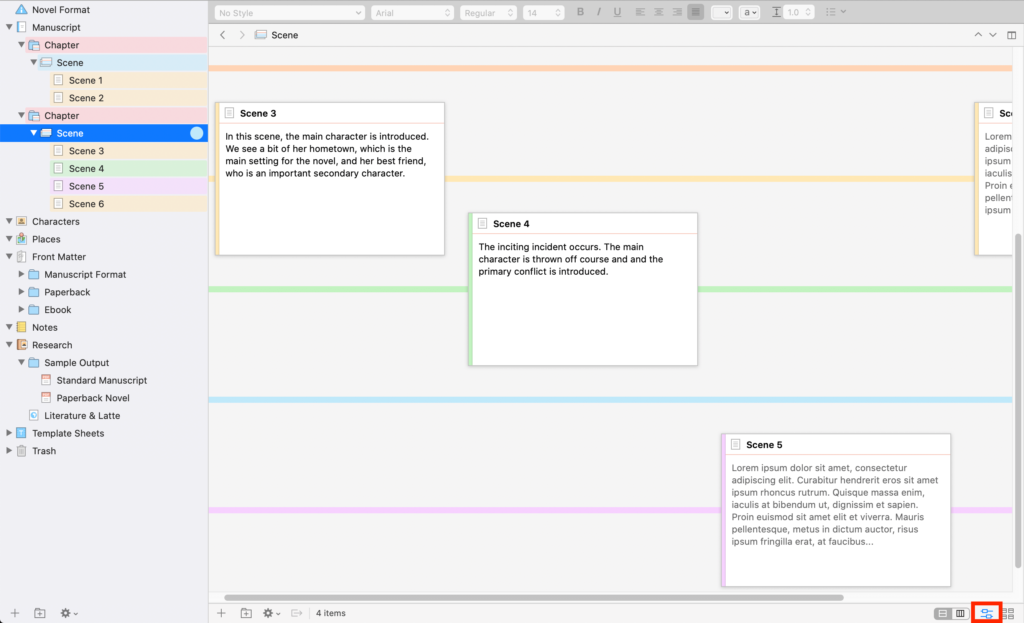
This view can be helpful for projects with multiple timelines or multiple POVs.
The final footer button will open the corkboard settings, which are fairly self explanatory.
The corkboard is especially useful if you’re in the early stages of writing and are still working through your ideas. The drag and drop functionality is perfect if you’re trying to determine the best structure for your project.
However, this tool can see you all the way through the process of outlining in Scrivener if you want it to. Visual processors may find this preferable to the other method that’s available.
Method 2: The Outliner
The outliner is a somewhat more traditional option for outlining in Scrivener. Like the corkboard, you can access it by clicking on its icon at the top of the Scrivener window:
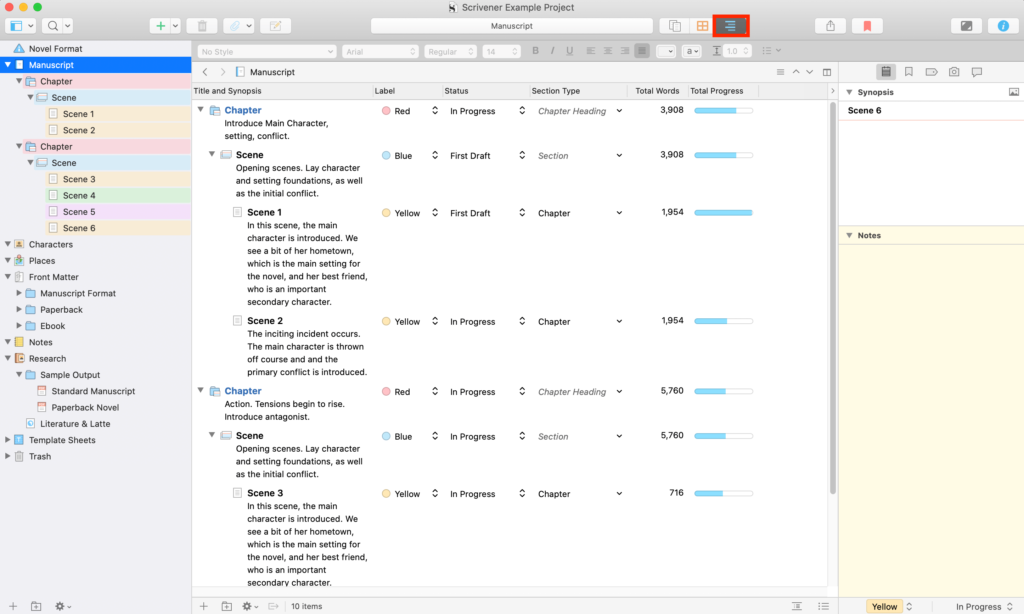
Compared to the corkboard, the outliner is much more linear. It also enables you to see an overview of your entire project, while the corkboard focuses more on specific sections.
The columns in the outliner are customizable. You can change their order by dragging and dropping them. The full list of available columns includes:
- Label: What color-coded label has been applied to this document
- Status: What stage of writing this document is in (first draft, revised, final, etc.)
- Section type: Is this a chapter, scene, etc.
- Keywords: Keywords applied to this section via the Inspector
- Created date: When the document was created
- Modified date: When the document was last edited
- Word count: The word count of the document
- Character count: The character count of the document
- Total word count: If the selected part is a folder, the word count of all the documents it contains
- Total character count: If the selected part is a folder, the character count of all the documents it contains
- Include in compile: Should this document be included in the compiled file when the manuscript is exported
- Target: The target length you’ve set for this document
- Target type: If the target is in words or characters
- Progress: A progress bar showing how close you are to your target for this section
- Total target: If the selected part is a folder, the total of all the targets of the documents it contains
- Total Progress: If the selected part is a folder, this progress bar shows how close you are to the total target
You can show or hide these options by going to View > Outliner Options.
As you can probably tell from reviewing all the options above, the outliner is much more detailed than the corkboard. This makes it ideal for reviewing your manuscript and re-outlining during the revision process. The target and progress trackers are extremely handy if length is an important element of your project. Likewise, the status feature is useful for keeping track of which parts you’ve already revised and which still need more attention.
Have questions about Scrivener? Let me know in the comments section, and make sure to subscribe to my email list for more tips!
Featured Image Credit: Unsplash.

Leave a Reply