Scrivener is a writing app that I use for my creative projects, but I’ve also used it for many academic papers throughout high school, undergrad, and graduate school. I feel its merits in this area are often overlooked, so I thought I would share my favorite features that came in handy when I was a student.
Below, I’ve given a thorough overview of Scrivener’s academic paper templates, as well as some key features. If you don’t know anything about Scrivener at all, I’d recommend reading my review before proceeding, so you can learn some of the basics of the app first.
This post contains affiliate links. I receive compensation if you use one of them to make a purchase.
Scrivener Templates for Academic Writing
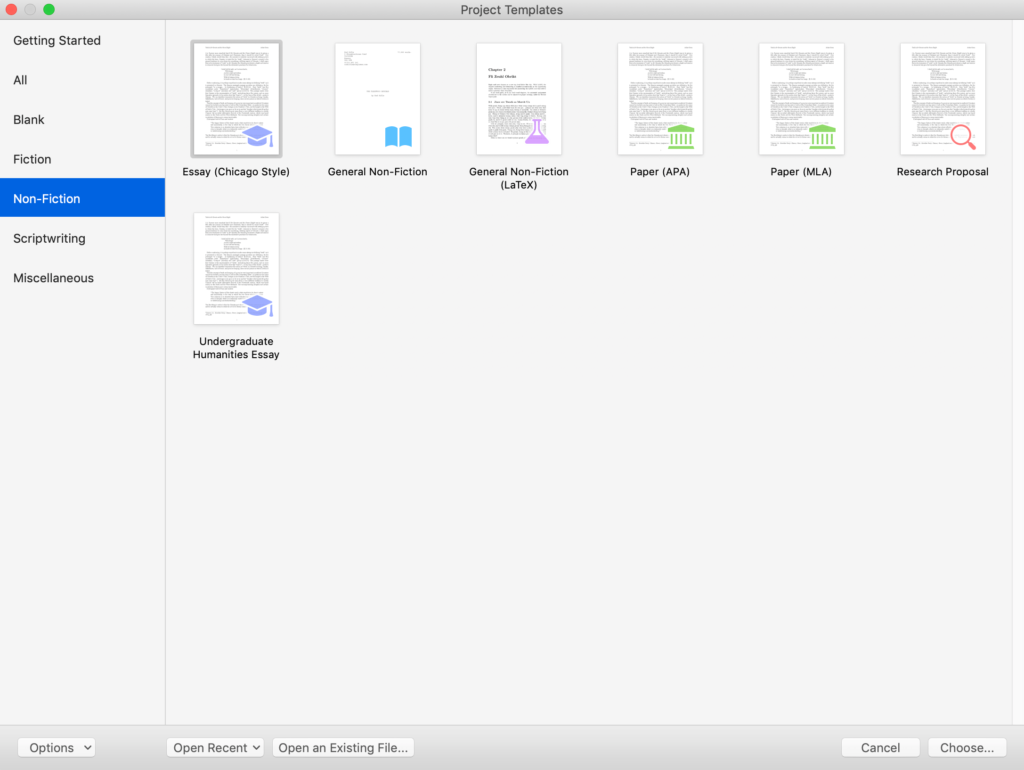
Among Scrivener’s project templates, there are four that may be suitable for academic purposes:
- Essay (Chicago Style). This format is primarily used for publications in the social sciences, such as History or Economics. It does not use in-text citations, but rather relies on footnotes and a bibliography.
- Paper (APA). Commonly used for papers in fields such as Psychology, Social Sciences, Education, Economics, and Business. This style uses an author-date in-text citation system with a full reference list at the end, and may include an abstract or outline before the main body of the paper.
- Paper (MLA). One of the most popular academic writing styles, MLA is commonly used in the fields of Literature, Liberal Arts, and Languages. It uses in-text citations that reference the author’s name, and a Works Cited list at the end of the paper.
- Research Proposal. This type of document may prove useful in many fields, including History, social sciences such as Psychology, and natural sciences such as Biology. It’s meant to explain your intended topic of study and methodology.
You can find these templates under Non-Ficiton when you open a new project in Scrivener:
Each Scrivener template also provides format notes, which you can find in the Binder when you open your new project:

This will include a PDF sample essay as well as a few general guidelines on how to cite your sources. There are also links to relevant resources with more extensive information, such as Purdue OWL.
Scrivener
I’ve been a dedicated Scrivener user for years. I’m confident you’ll love it as much as I do! Click the buttons below to find out more about this wonder app, or purchase Scrivener right away.
Using Scrivener for Academic Writing: Key Features You’ll Want to Know About
Keep in mind that this post is not a review of Scrivener’s full feature set. For our purposes, I’m going to focus on the tools this app provides that I have found most helpful when using it for academic writing.
Certainly, there are some papers that you can easily draft in Microsoft Word or Google Docs with no trouble whatsoever. Scrivener would probably be overkill for your three-page Philosophy 101 essay.
However, for longer and more-involved projects, Scrivener’s organizational tools, formatting, and writing interface can make the whole process easier and more enjoyable. Here are some top features to put to work on your next assignment.
Outlining Tools
Scrivener’s built-in outlining tools are one of the most-loved features of the app. They’re great for organizing your ideas, and there are many different ways to use them, so they’re adaptable to your personal preferences.
The first such tool is the Binder, which you’ll see on the left side of the Scrivener interface:
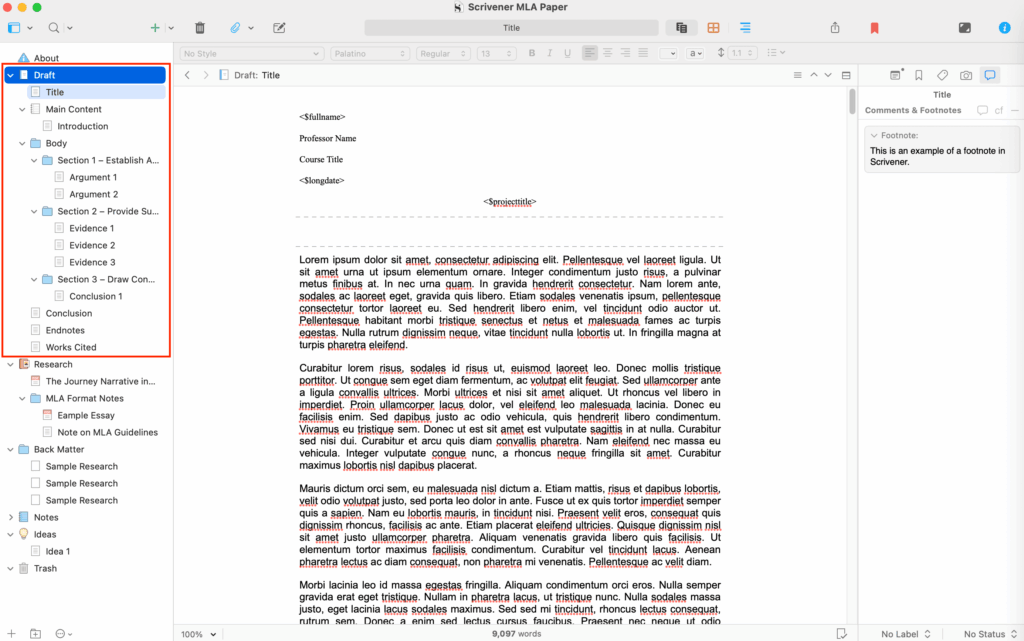
This feature is primarily used for big-picture planning of your project’s structure, as well as storing various documents. However, its drag-and-drop capabilities can make it handy during the early stages of the writing process when you may want to move sections of your paper around.
The more traditional outliner may be preferable to some writers who want to include extensive notes on each section of their essays. It also provides a more complete visual representation of your paper’s structure without the clutter of notes or research:
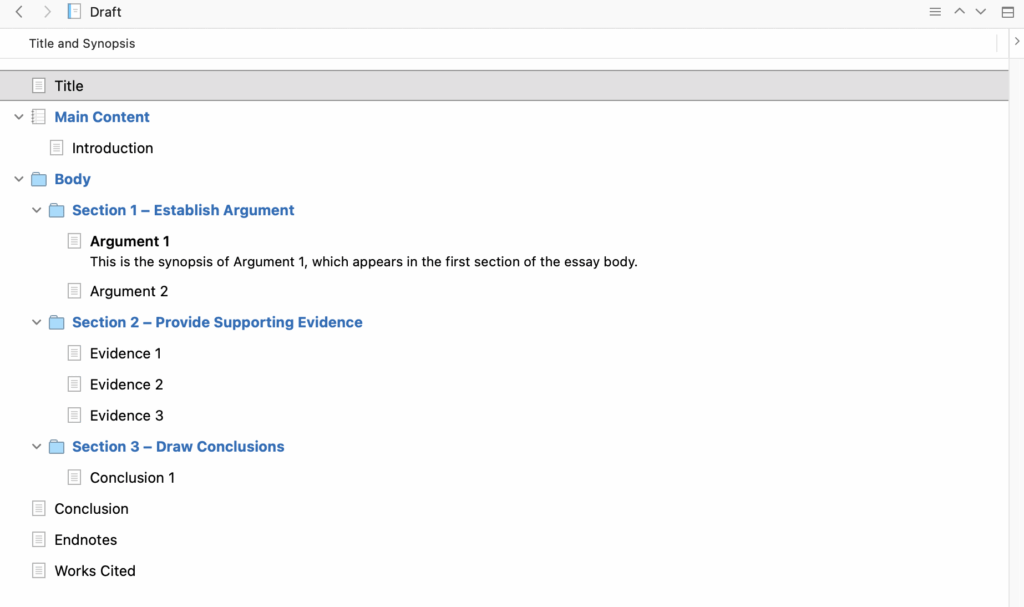
You can add synopses for each section in the inspector to the right of the main drafting area:

A third option is to use Scrivener’s corkboard:

Here, you can jot down ideas on index cards and order them as you see fit. This is excellent for the brainstorming stage, when you want to be able to make quick notes and move them around.
Research Importer
Probably my favorite Scrivener feature when I was writing academic papers was the research importer. No more sifting through a dozen tabs in my browser trying to find the right journal article or website to cite — you can have everything you need in one window, available at the click of a button.
Just click on the Research icon in the Binder, then select File > Import:
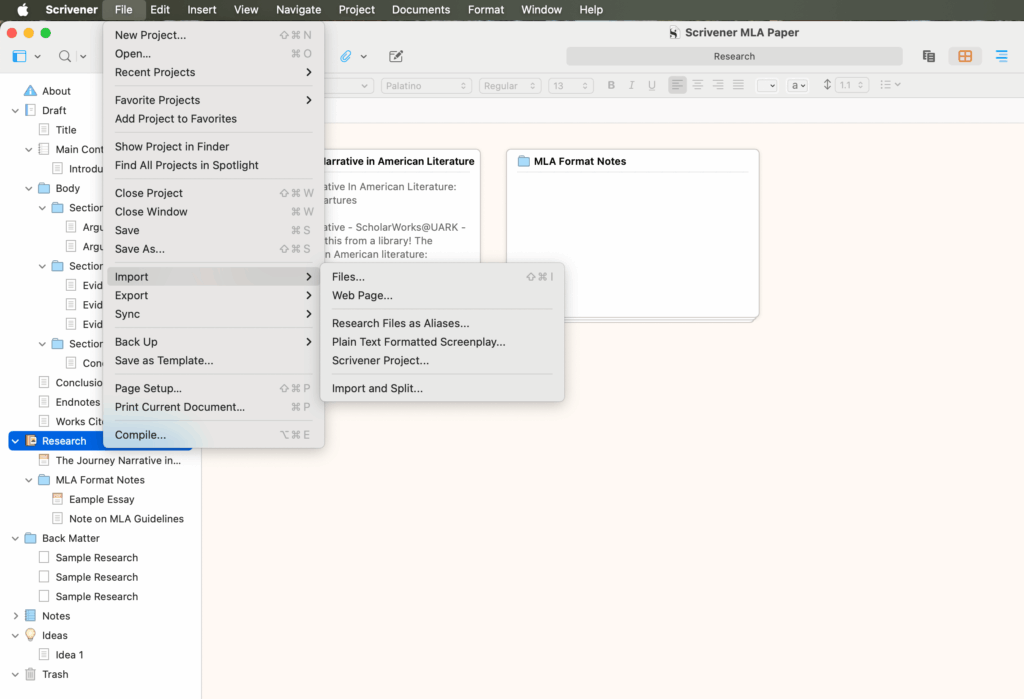
You can choose a file that you have saved on your computer (perfect if you’ve scanned pages from books in your university library or downloaded an article from a journal database) or enter the URL for a relevant webpage.
Then, just click on the item’s title in the Binder to view the file or webpage:
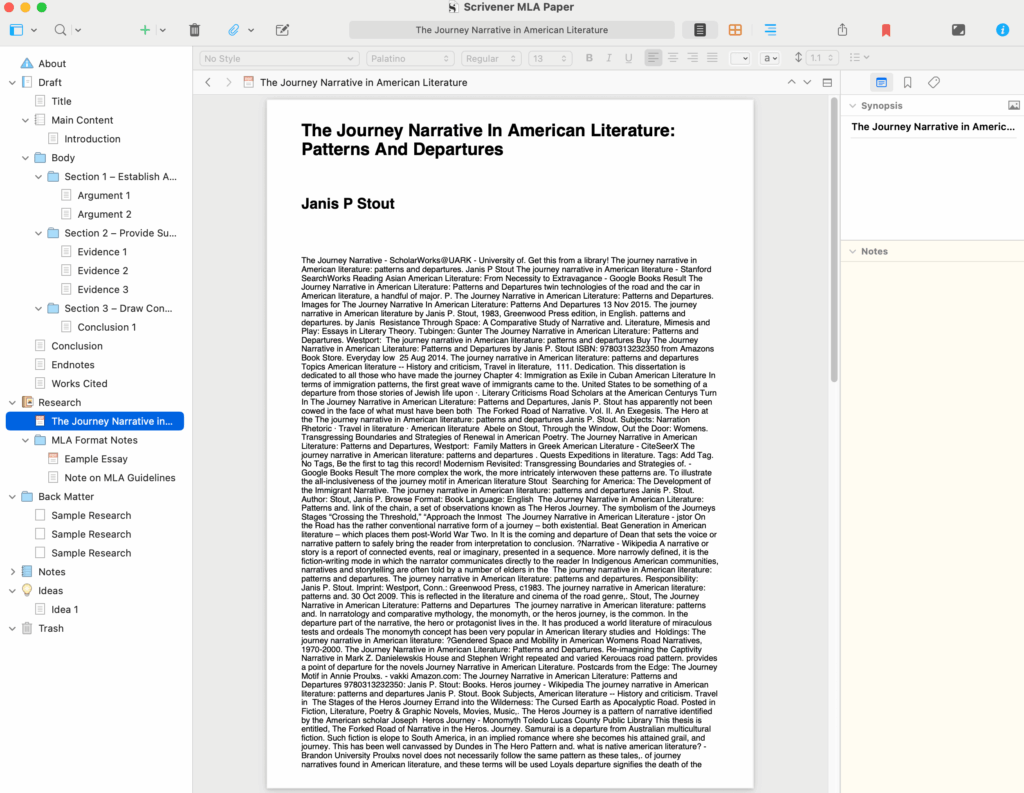
This can help you stay on task (no temptation to go browsing the web), and speed up your writing process by keeping all your sources on hand.
Dual Screen View
Another handy feature that could help you get through your paper faster is Scrivener’s dual screen view:

This is particularly useful when you need to copy over quotes from research you’ve imported into the app. You can enter dual screen view by clicking on the icon in the top right corner of the main drafting area:
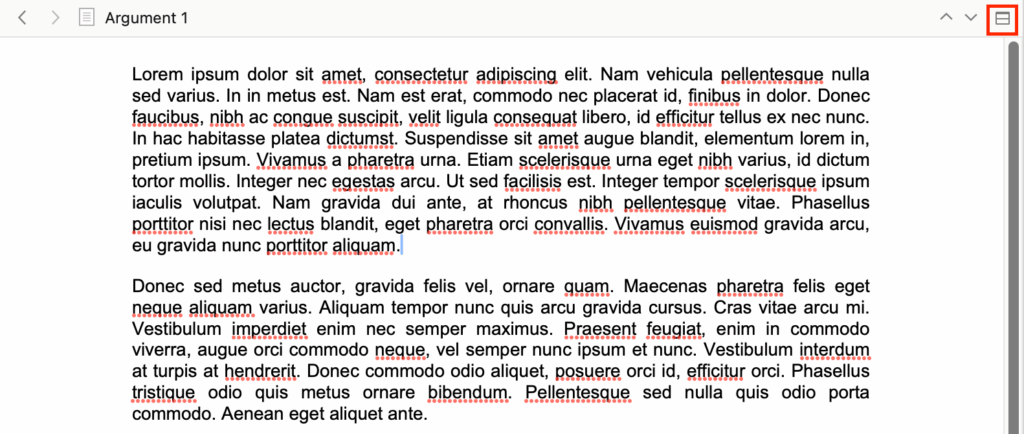
Dual screen view also makes it easy to refer back to earlier parts of your paper while you’re writing.
Ideas
There’s no telling exactly when a new idea for your paper might strike. If you’re in the middle of a specific section and don’t want to stop working on it to pursue a separate train of thought, Scrivener has you covered.
There’s a convenient Ideas document included in your project by default:

Here, you can dump any ideas you want to come back and address later.
Comments
If you haven’t waited until the night before the deadline to finish your paper, you’ll probably want to read through it before you hand it off to your professor. During this editing process, you can leave comments for yourself regarding any revisions you want to make.
In the inspector, click on the speech bubble icon to open the Comments & Footnotes section. Then highlight the relevant text in to drafting area and click on the second speech bubble icon to add a new comment:

This feature is very similar to the Microsoft Word and Google Docs equivalents. If you use this functionality while working in those apps, you won’t miss it if you switch to Scrivener.
Footnotes
Inserting footnotes is almost always a pain. Compared with other apps, Scrivener makes the process relatively easy. You can add a new note much like you would a comment, using the Comments & Footnotes section of the inspector:
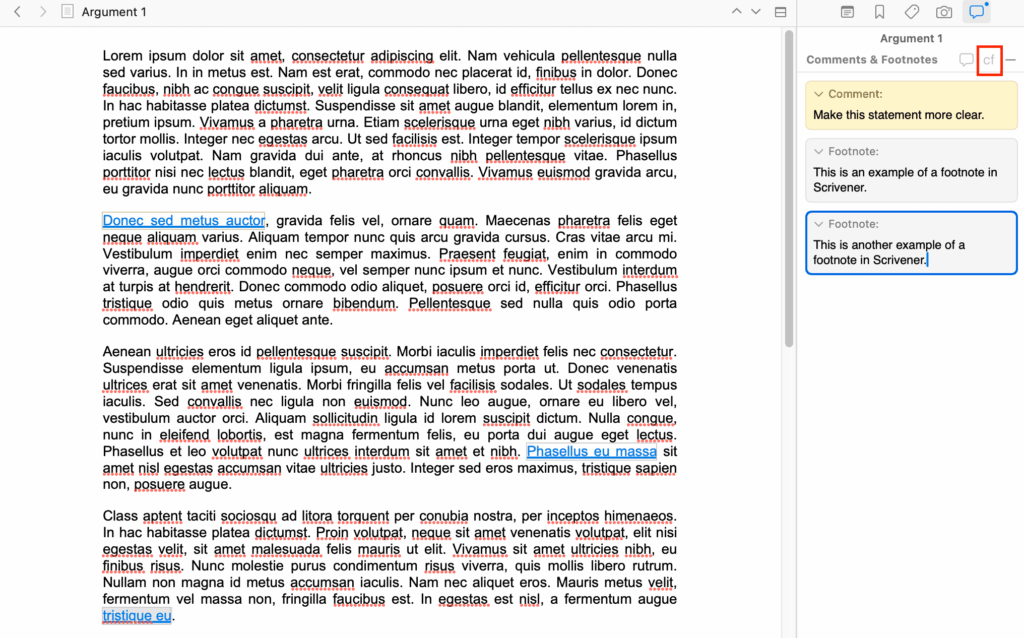
Just click on cf to add your footnote, then type the citation directly into the designated area in the inspector. This makes it very easy to track, manage, and revise your footnotes as necessary.
Endnotes and Works Cited
Last but most certainly not least, Scrivener will help you bring together all your references and sources into a proper list of endnotes or a Works Cited page.
This feature obviously differs a bit depending on which format you’re working with. I’m going to focus on the MLA template, since this is the most popular style for academic papers.
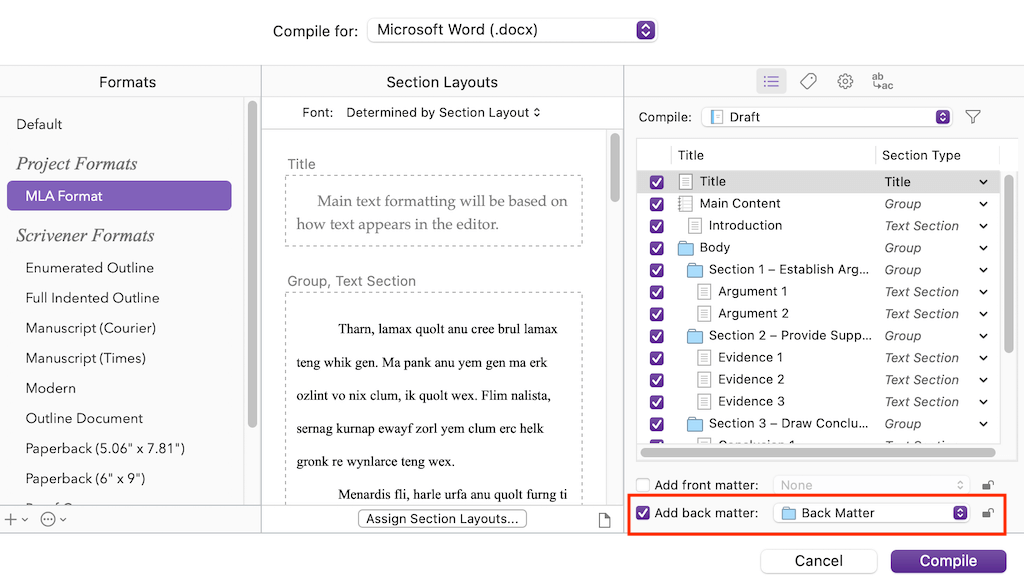
All of your footnotes will automatically be collected into an endnotes page. Don’t worry if you don’t see them when you click on the Endnotes document in the Binder — they’ll be added when you compile your project to print it or convert it to a file type you can upload for digital submission to your professor.
As for your Works Cited page, Scrivener sets you up with a template filled with sample citations:
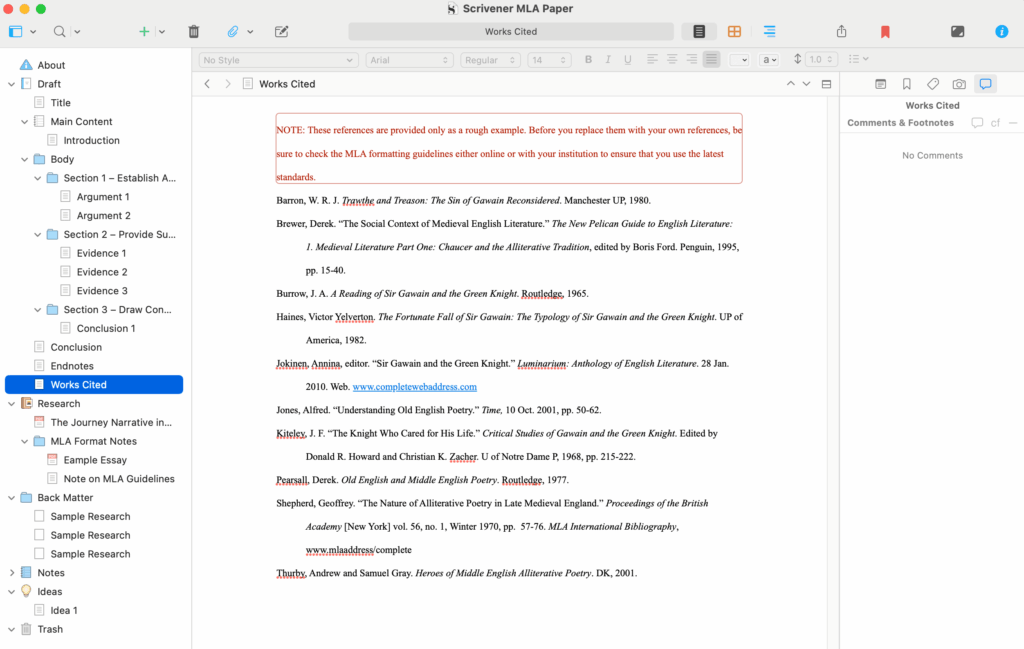
You can use this as a guide for your own sources and simply replace the examples with your references. It’s recommended that you double check the most recent MLA guidelines to ensure that you’re using the most up-to-date formatting.
Scrivener: Your Academic Paper Project Manager
Scrivener is usually touted as a creative writing app, but it also has templates and features that come in handy for academic papers. It makes it easier to organize your material and stay focused when working on your assignments.
If you’re feeling hesitant to invest in a writing app, keep in mind that Scrivener offers a student discount. There’s also a free trial if you want to take it for a spin before you commit.
Want to see more posts like this one? Make sure to sign up for my monthly newsletter and follow me on Instagram!
Featured Image Credit: Unsplash.

Leave a Reply